Science Mom's Guide to Water, Part 6
Learn about why things dissolve in water with six fun crystal growing activities
Science Mom’’s Guide to Water, Part 6
In Part 5 of the water series we learned that although water is called the “Universal Solvent,” it doesn’t dissolve oil. But what about the things water can dissolve? In Science Mom’s Guide to Water, Part 6, we explore what dissolves in water with several crystal growing activities:
Like I mentioned in the above video, we went through those six activities really quickly – particularly the last two. So here are a few quick tips, as well as notes on each activity and an additional short video:
Tip 1: The slower the crystal growth, the larger the size of the crystals. There are two ways you can slow the growth: by having a less concentrated solution, or by having the temperature decrease more slowly.
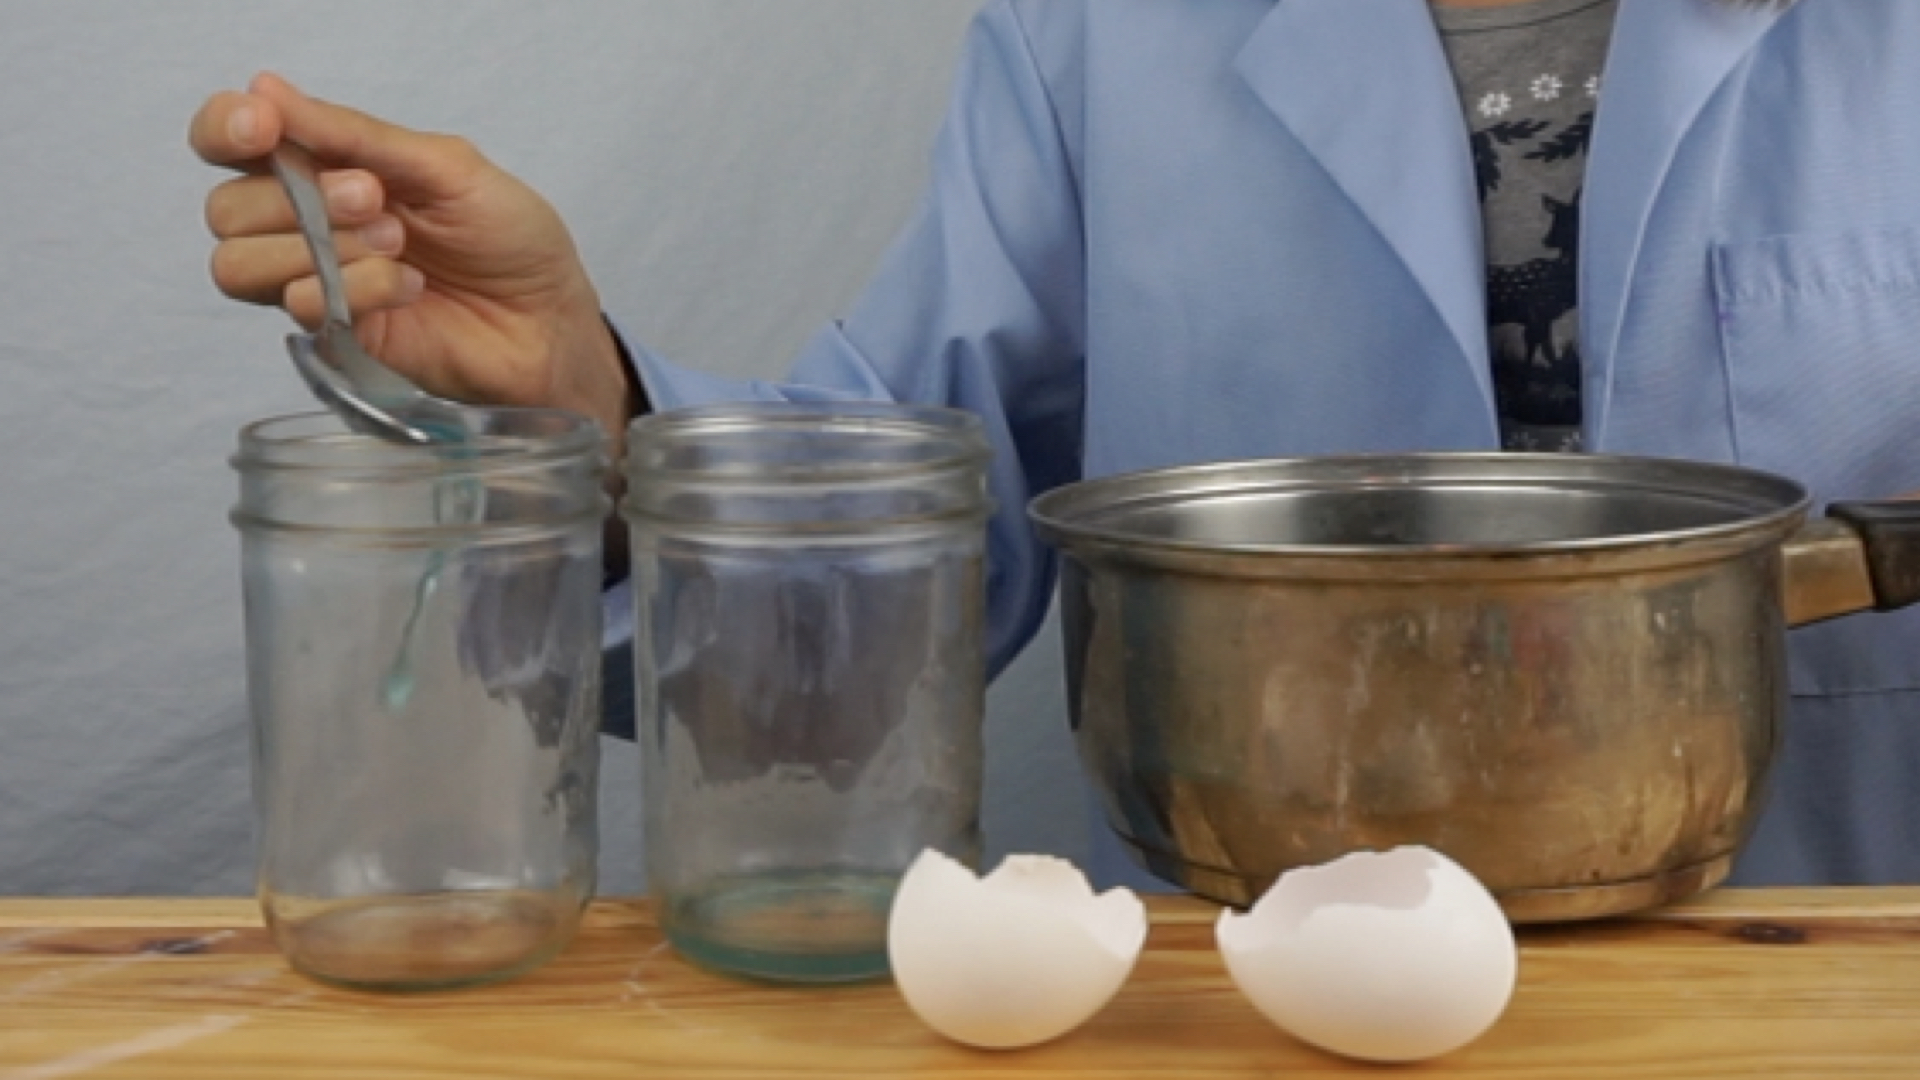
If you pour your solution into a glass jar when it’s very hot, BE SURE TO TEMPER THE GLASS FIRST. Do this by adding just one spoonful of hot liquid and swirling it around the bottom of the jar. This heats the glass so it doesn’t break when you add the rest of the liquid. Hot water in the jar will cool more slowly than it would in the pot. The pot conducts heat very efficiently and the water is also more spread out and has a larger surface area.
If you want to grow larger size crystals then you’ll either want to put the solution into the container when it’s still very hot, or reduce the amount of solute you use and wait longer for crystal growth. If, on the other hand, you want a smaller size of crystal, then you’ll want to let the solution cool down in the pot before adding it to the jar.
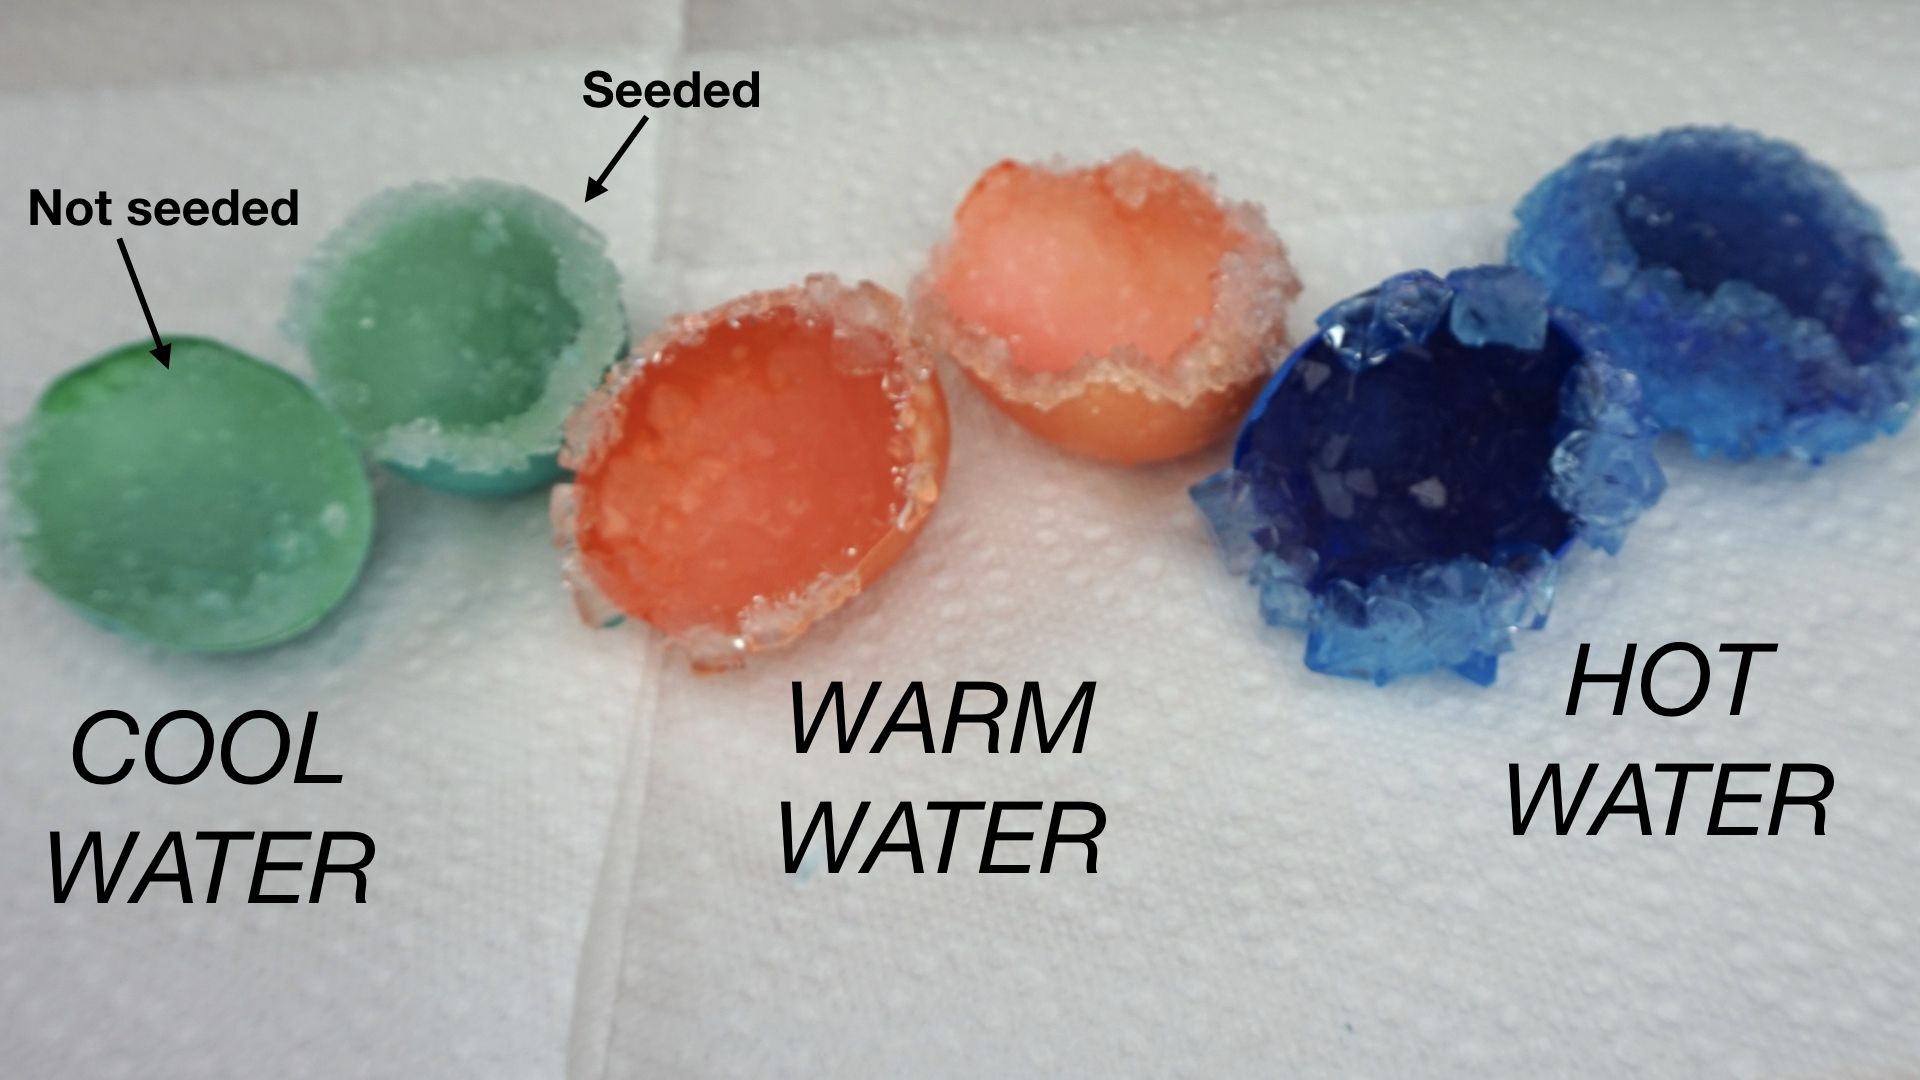
In the above picture, you can see eggshell geodes from six different jars. The green eggs on the far left were put into water that was luke-warm. It had cooled down almost to room temperature and you can see that the crystals are very small, almost like grains of sand.
The eggs in the middle were placed into water that was still very warm, but not a temperature too hot to bathe in. Most of the crystals are the size of gravel and distinct from each other.
And the blue eggs went into water that was nearly boiling. The alum solution had just come off the stove and after tempering the glass a bit, the hot liquid went straight into the jars and then the eggshells followed. All of the eggshells on the top row were seeded; I rubbed a little elmers glue onto the inside of the shell and sprinkled dry alum powder over them before putting them into the solution. The shells on the bottom row were not seeded.
Tip 2: Use distilled water. If you live in an area with hard water, the dissolved calcium and magnesium ions that are already in solution will affect the crystal growth quite a bit. Even without hard water, distilled water helps you to get more of your solute to go into solution. Pick up a gallon of distilled water from the grocery store before you start.
Tip 3: All of these crystals will dissolve again in water. That’s good news if you’d like to experiment and redo the projects again several times, because you can just boil up your crystals and reuse them. But if you’d like to keep them long term as an art project or decoration, be sure to coat them with a clear coating of nail polish.
And now, a few quick notes and recipes. You can also find the recipes on the foldable book at the bottom of the page:
SALT CRYSTALS
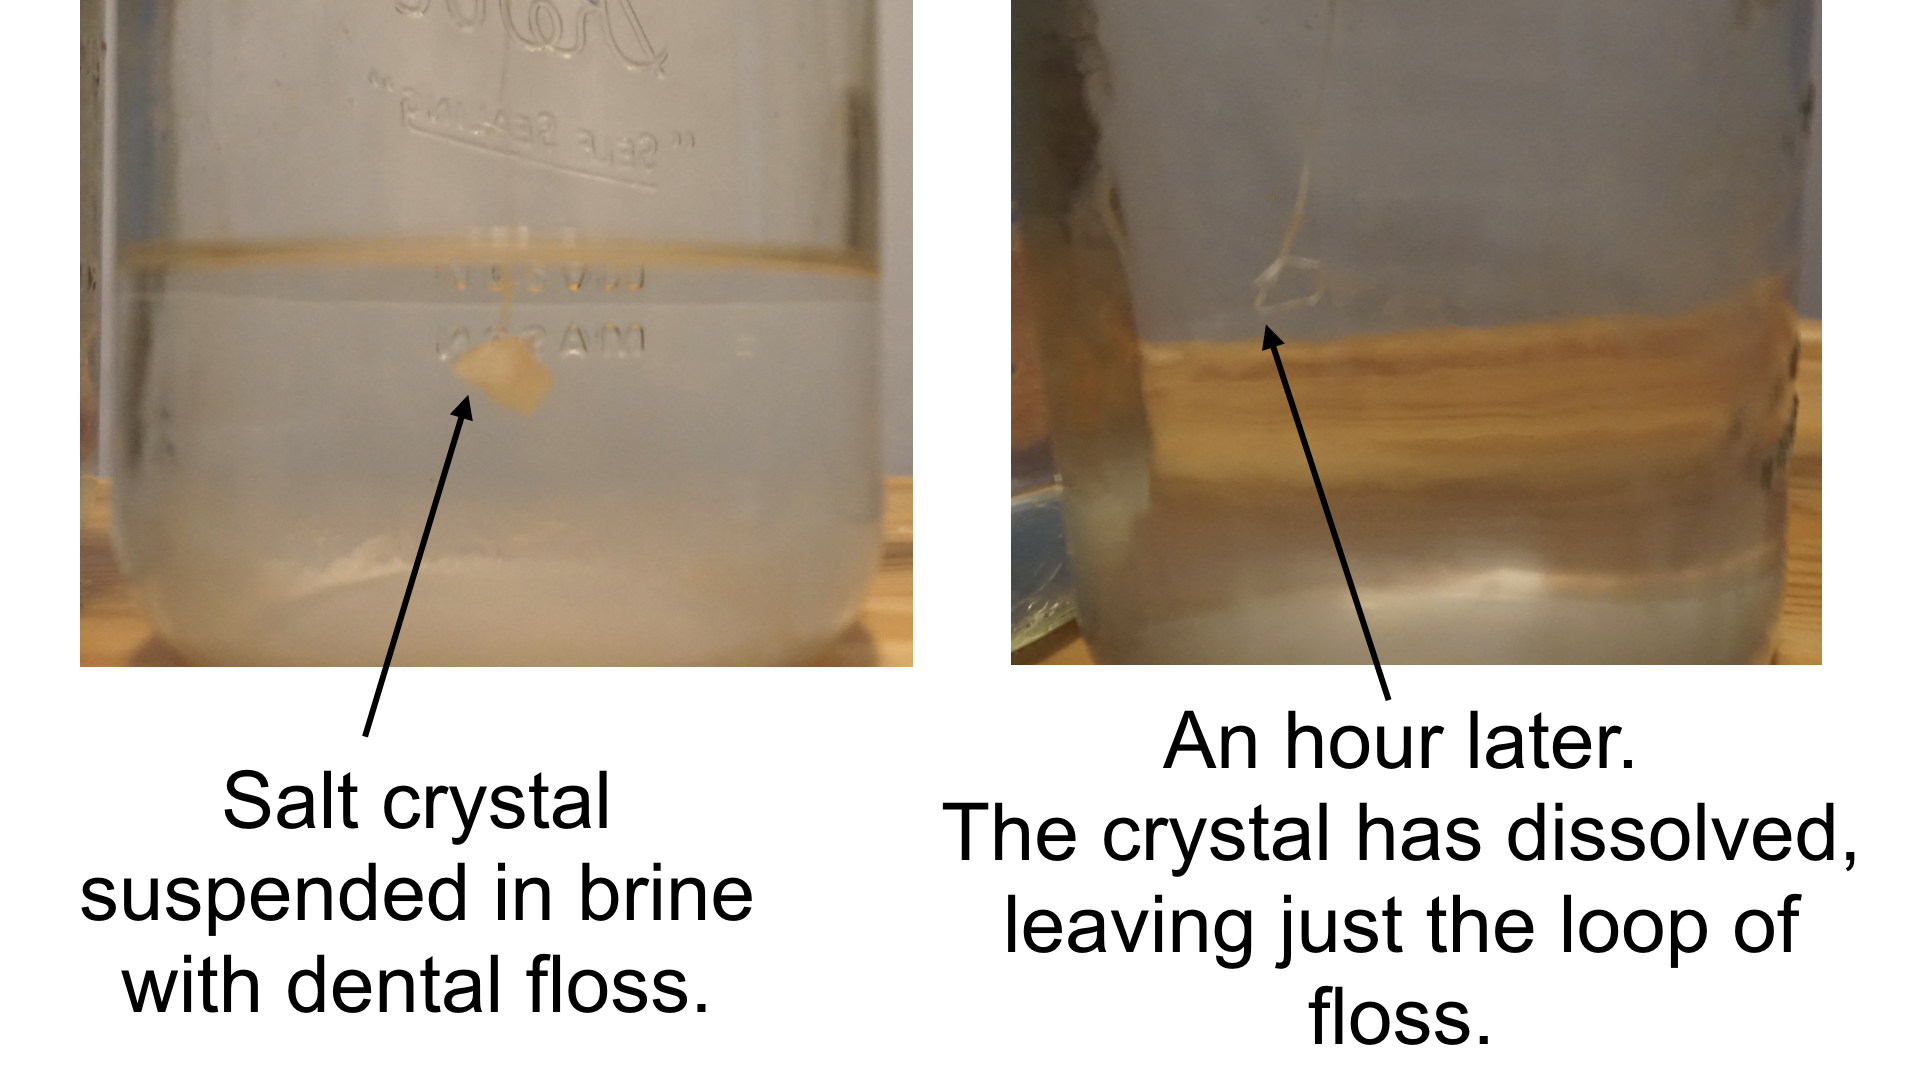
In theory, you should be able to place a seed crystal into a saturated solution of salt water and grow an even larger crystal. In practice, I was never able to get this one to work. Each time I placed my seed crystal into solution, it dissolved, and I was left with an empty loop of floss or string like you see in the picture below. If you’re able to grow a large salt crystal, please leave a comment or send me a message. I’d love to see a picture!
But for salt crystals all clumped together in a jar? These are easy. Just let salt water sit in a jar and wait. And wait. It requires a good amount of time, up to a month or more if you have a less concentrated solution.
HALOCLINE EGG
When you make your halocline, be sure that the top layer of water doesn’t splash into the salt water too much. If you create currents or stick a spoon into the jar and mix it, then of course the salt and fresh water will mix and the halocline will disappear. But if you pour the fresh water in slowly and let the stream of water land on a spoon before it touches the salt water, then it should work.
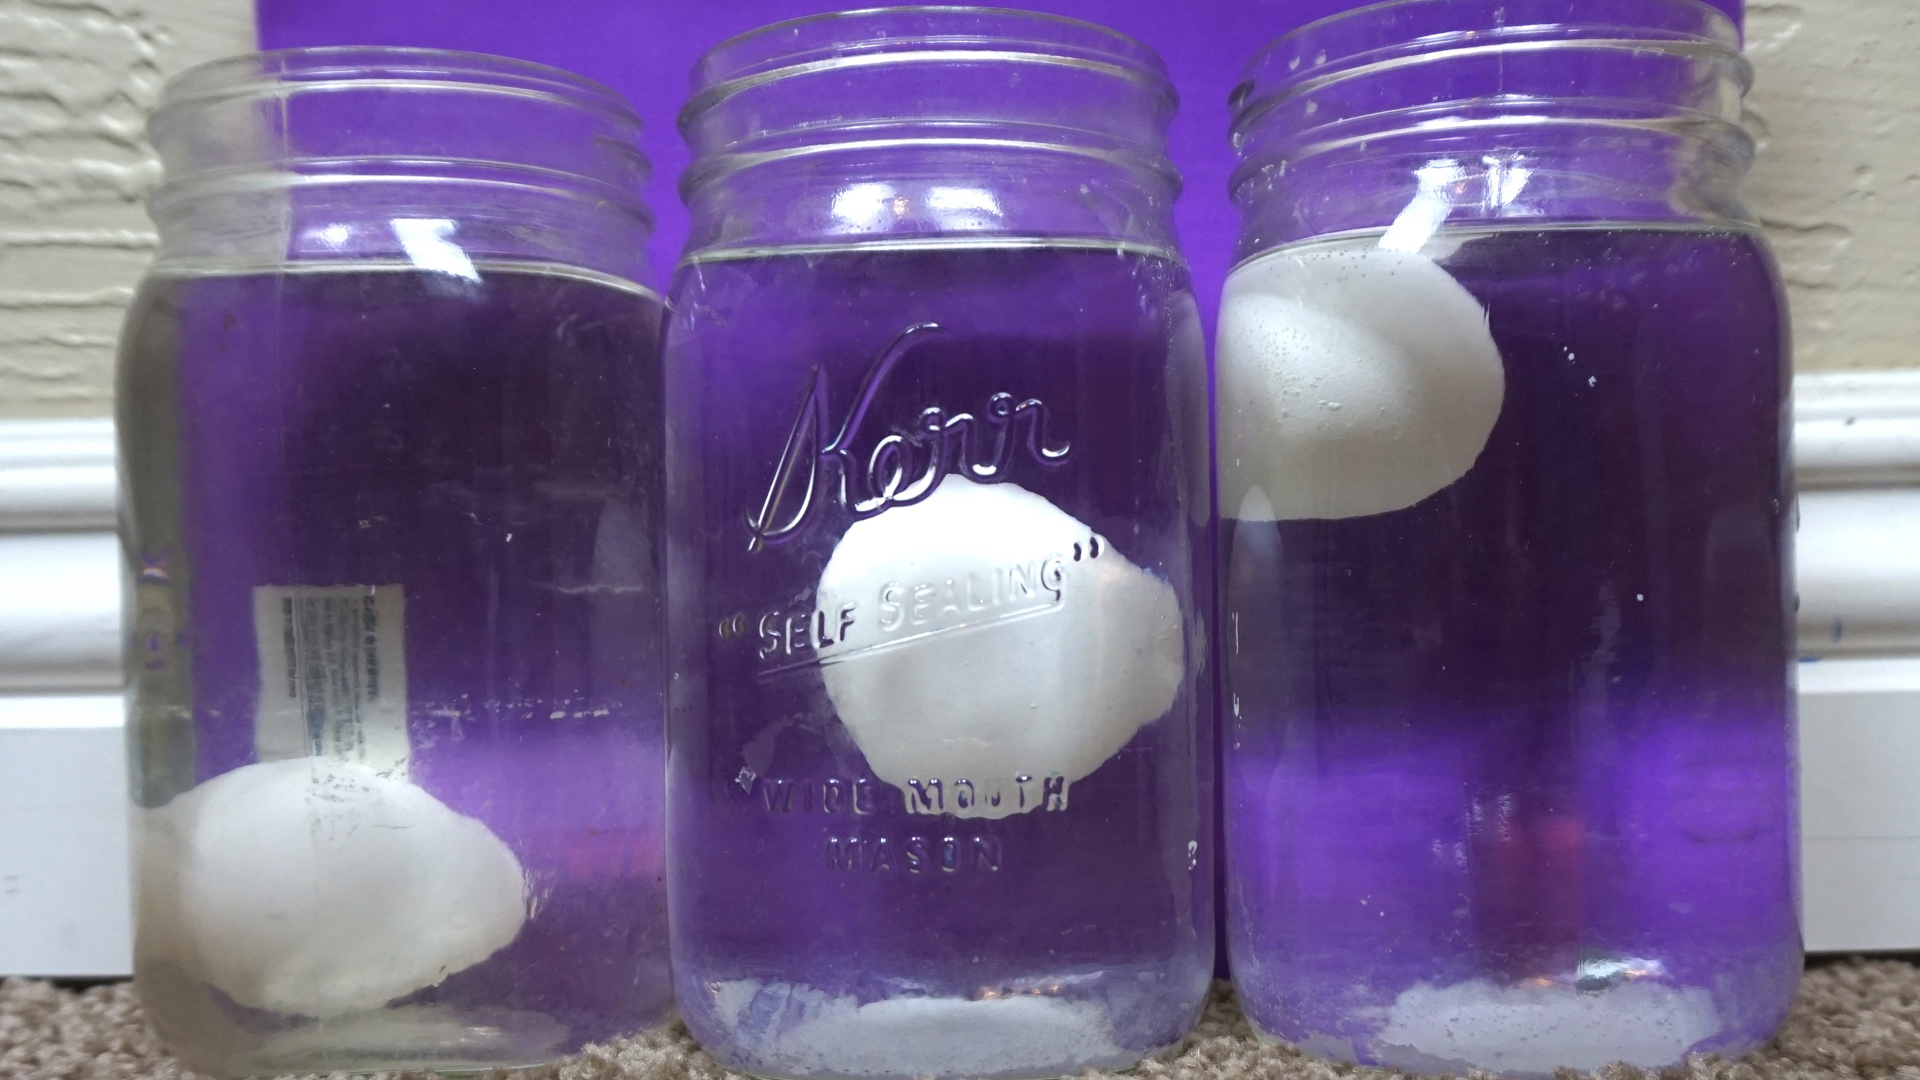
After several hours, the salt water loses it’s cloudy appearance and it almost looks like a magic trick to see this egg hovering in the middle of the jar. The halocline layer is very stable. The eggs in the above picture had been sitting in the same positions (bottom, middle, top) for two weeks.
EGGSHELL GEODES
With the eggshells in the picture under tip 1, it looked like seeding did help to promote more uniform crystal growth. But in subsequent batches, I didn’t get very consistent results. Take the crystal below, for example, which had been seeded with alum and then placed in very hot water and grew crystals on only a few locations.

With hot water especially (which perhaps melts off the glue anyway?) I concluded that the texture of the eggshells plays an even bigger role than seeding. I think scratching the inside of the shell lightly would probably do just as much to promote crystal formation inside the shell as seeding it with dry alum.
Suggested recipe (makes 2 eggshell geodes):
- 2 pint-size mason jars
- 2 eggshells
- 2 2/3 cup water
- 1 1/3 cup alum
- Food coloring
Note: the alum doesn’t incorporate much food coloring into its crystal structure, so if you want to see a tint of color to the crystals, you’ll want to add a lot of food coloring (think 20 plus drops). Most of the coloring will end up on the eggshell.
BORAX SNOWFLAKES
Borax are good reliable crystals that grow quite easily. No need to seed your pipe cleaner in advance. The texture is rough enough that the crystals will grow all over it.
Suggested recipe (makes 1 large pipe-cleaner crystal)
- 1 quart-size mason jar
- 1 pipe cleaner
- string or floss and a pencil to suspend the pipe cleaner
- 1 cup borax
- 4 cups water
- Food coloring
Bring to boil to dissolve the borax and pour into jar. Again, letting the solution cool in the pot first will produce a finer texture to the crystals, and putting it in hot will give you blockier and larger crystals. Use a lot of food coloring if you want to see a tint of color to the crystals (or for color you can rely on the colored pipe cleaner that you’ll be able to see through the crystals).
ROCK CANDY
I’d recommend adding some flavoring to your rock candy, because the sugar flavor is somewhat overpowering when you make it plain. Lemon extract would be a good choice. You can find the recipe both below and in this 3 minute video:
Suggested recipe (makes 2)
- 2 quart size mason jars
- 2 cake pop sticks or popsicle sticks
- 2 coffee filters
- 6 cups sugar
- 2 cups water
- flavoring and food coloring (optional)
If you want to grow rock candy as quickly as possible, you can use the fully saturated 8 cups of water to 2 cups of sugar. But this will crystalize very quickly (within a few hours), and if you leave it too long, you won’t be able to get it out of the jar. The ratio of 7 cups of sugar into 2 cups of water will usually be done by the end of one day, but 6 cups seems to be the right balance to me. It has the benefit of being able to see visible progress but progresses slowly enough that you’re not being in danger of having the crystals get away from you and get stuck to the jar.
And, like you saw in the short video above, making sugar gemstones is, in my opinion, and even better way to experiment with sugar crystals. This one does require some patience, because large size crystals take several weeks to grow.
BATH BOMBS
Citric acid and epsom salts can be found in some grocery stores, but it’s probably easiest (as with the alum) to order them online.
Suggested recipe (makes about 8 small bath bombs)
- 1/2 c baking soda
- 1/3 c cornstarch
- 1/4 c epsom salt
- 1/4 c citric acid
- 1 Tbsp water
- 1 Tbsp oil (any kind)
- 20 or so drops of essential oil
- a couple drops food coloring (optional)
Mix the dry ingredients and wet ingredients in separate bowls. For the tablespoon of oil I recommend using whatever unsaturated cooking oil you have on hand (canola, olive, vegetable). If you’d like to purchase a nicer cosmetic oil (such as jojoba oil or castor oil), that’s a perfectly good option too.
Use a whisk to slowly combine the dry ingredients into the wet ingredients until the mixture has a sandy texture. You can pack the bathbombs with your hands into spheres or small bricks and let them sit for 48 hours, and they will work just fine. But if you want them to look like the type you’d find in a store, use small bath bomb molds. I thought plastic easter eggs would be a great hack for this – but it turns out that they’re almost impossible to get out of the eggs once you’ve packed them in and they’ve dried. I had to dump the whole egg in water and use the bath bomb to get it out. Just so you know. ;)
That about covers it! If you’d like to preview the little foldable book that accompanies this guide, you can do so by scrolling through the pages in the viewer below. To print your own copy, just select your preferred size of paper: 8½ × 11, 11 × 17, A3 or A4. Don’t forget to print “Actual size.” Do not print “Fit to page” or the book won’t come out right. To fold the book, either print the two-page document double sided, cut along the dotted lines, and then match the letters, or follow the instructions in this video: How to Fold A Book from One Piece of Paper.
Guide Preview
